If you haven’t already heard of the phenomenon that is slime, you are in for a treat. Beloved plaything of children everywhere – and the bane of their parents because it inevitably gets lost, covered with dog hair and other sticky unmentionables, or worn out from being played with so much. All this means that you as the parent have to keep on buying the stuff!
Of course you want to see your little cherubs happily playing with something they love, right? So how to do this without having to spend all your time and money ordering new slime kit? You learn to make it yourself, that’s how – and I am here to tell you how to make slime with two ingredients. It’s ridiculously easy, and very cheap!
What is slime?
Slime is a product that was invented in 1976, and was originally made from Guar gum. It acts as both a solid and a liquid, depending on how you play with it – this adds to the charm and intrigue of slime for kids.
Kids are fascinated by the squishiness and the fact that it can be moulded into any shape, while adults often find that slime resists being squeezed in the same way that a stress ball does, meaning that it’s great for reducing tension.
It is great fun to play with, squish between your fingers, and observe all of its different properties. Bear in mind however, that it is very difficult to remove from the carpet!
Slime can be very helpful for a lot of things, including encouraging imagination and manual dexterity.
It’s also a good introduction into science lessons, and a very satisfying sensory experience for all children, who will love the feel and properties of slime.
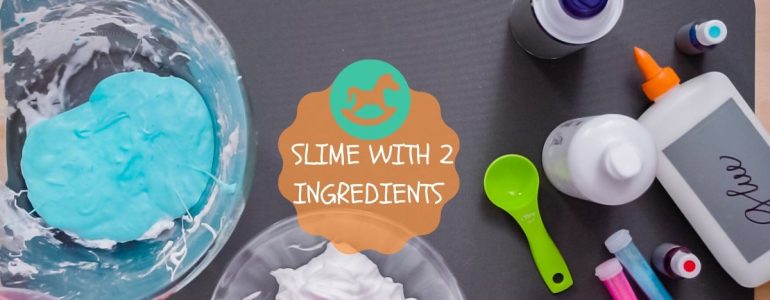
How to make slime with two ingredients
The easiest, cheapest and and most basic way to make slime is to combine cornstarch and conditioner. This clever and simple recipe makes a smooth, fluffy slime which is completely non toxic and great fun!
- Using a clean bowl, add a cupful of cornstarch and the same amount of hair conditioner.
- Start by mixing it together with a spoon; it will take a minute or two for the right consistency to develop.
- Add some more cornstarch if the mixture is too wet, and some more conditioner if it is too dry.
- Start to mix it with your hands – the warmth will help the process.
- Knead it and stretch it between your hands, and you will be left with a smooth, stretchy slime.
- You can add food colouring to make it a different colour; simply make a well in the slime and pour in a little colouring, then massage it in till it’s totally combined.
An alternative recipe is to make slime using glue and liquid starch – you simply combine the two ingredients together in 2 tablespoon increments until you have the desired consistency. This recipe tends to be a little stickier, and can be less suitable for younger children due to the addition of the glue.
You can add food colouring to this recipe too, or even use coloured glue to change the shade.
What can you do with slime?
Slime is what is known as a non Newtonian fluid, which means that it acts as both a liquid and a solid.
If you treat it gently it will seem much more fluid, but if you play with it roughly it will feel almost like a solid. This is absolutely fascinating for kids, and they will really enjoy playing with the slime and its different properties.
Making slime yourself with your kids will help them learn about following recipes, measuring ingredients, and can foster independence and creativity.
The home made versions tend to be much less viscous, so they will feel a little more like play dough than the store bought ones – but this can be a bonus too, to prevent slime dripping over your carpet, and allowing a greater range of creativity with the finished product.
Plus, making your own is cheap and easy to make it yourself, so why wouldn’t you?
You can add all sorts of things to your home made slime; try experimenting with different colours, glitter, foam balls – anything that adds more interesting texture and colours to the slime.
Dos and don’t of slime
1. Don’ts
- Like the vast majority of children’s toys, it is recommended that you don’t eat it. Home made slime contains no really nasty chemicals, but you still don’t really want to be munching on a mouthful of flour and conditioner!
- Try to avoid getting it on your soft furnishings. Slime can very easily break into little pieces, which can then be ground into the carpet or scrunched into the sofa – and it is notoriously hard to get rid of once it is there!
- Don’t add small parts if you are giving it to a young child. You can jazz up your slime with any number of additions, but bear in mind that young children do put everything in their mouths, so just about anything is a choking risk.
2. Dos
- Do experiment with your slime. This is meant to be fun! Try out different colours, add glitter, try a different scent of conditioner – you can completely personalise this versatile toy, so let your imagination roam!
- Make sure you store your slime safely after it has been finished with for the day. An airtight tub is ideal, as this will prevent spillages, and also stop the slime drying out or attracting dust and fluff.
- Encourage your kids to come up with their own ideas about what sort of slime, and what sort of additions they should put in it. This will encourage their creative streaks and fire up their imaginations.
Final words
How to make slime with two ingredients is a fun experience, which will engage the whole family, put sibling rivalry aside, and get everybody involved with playing together. Making it at home is very safe, and it will give you all hours of fun.


